This is the ULTIMATE guide to Stinger Transitions for streamers.
In this comprehensive tutorial, you’ll discover, step-by-step, how to:
- Create stunning Stinger Transitions online
- Customize them to match your brand
- Set them up in OBS Studio and Streamlabs
- Troubleshoot common issues like a pro
Ready to level up your stream? Let’s get started.
Contents
- What Are Stinger Transitions
- Types of Stinger Transitions
- How to Create banger Stinger Transitions in 2 min
- How to Setup Stinger Transitions
- Best Practices for Stunning Stinger Transitions
- Common Issues
1. What Are Stinger Transitions: Why You Need Them
example: the Stinger Transition in action
The Basics: What’s a Stinger Transition?
Imagine this: you’re streaming gameplay, and you want to switch from your “Live” scene to your Starting Soon or “BRB” screen.
Without a transition, it’s just an awkward cut—boring and jarring.
Enter Stinger Transitions: short, animated clips (usually 2-3 seconds) that play between scenes, making the switch smooth, stylish, and professional. For example from intro to live scene.
example: the Stinger Transition with Live to BRB screen
They often feature cool visuals like swooshes, fades, or themed animations, and some even include sound effects for extra flair.
Technically speaking, Stingers are video files (like .webm) with a transparent background, thanks to something called an alpha channel.
This transparency lets your stream content shine through while the animation does its magic.
Why Stinger (Twitch) Transitions Matter

source: twitch.tv/bliskapuu
You might be wondering, “Do I really need these?” Here’s why they’re a game-changer:
- Boost Engagement: Smooth transitions keep viewers hooked, avoiding those clunky scene jumps that scream “amateur”.
- Build Your Brand: Custom transitions with your logo or style make your stream memorable.
- Show Creativity: From cyberpunk vibes to anime speed lines, Stingers let your personality shine.
In short, they’re like the cherry on top of your streaming sundae—small but impactful.
Try profounder Transitions
Here’s where it gets exciting. Creating Stinger Transitions used to mean wrestling with software like Adobe After Effects or paying big bucks for pre-made ones. Not anymore.
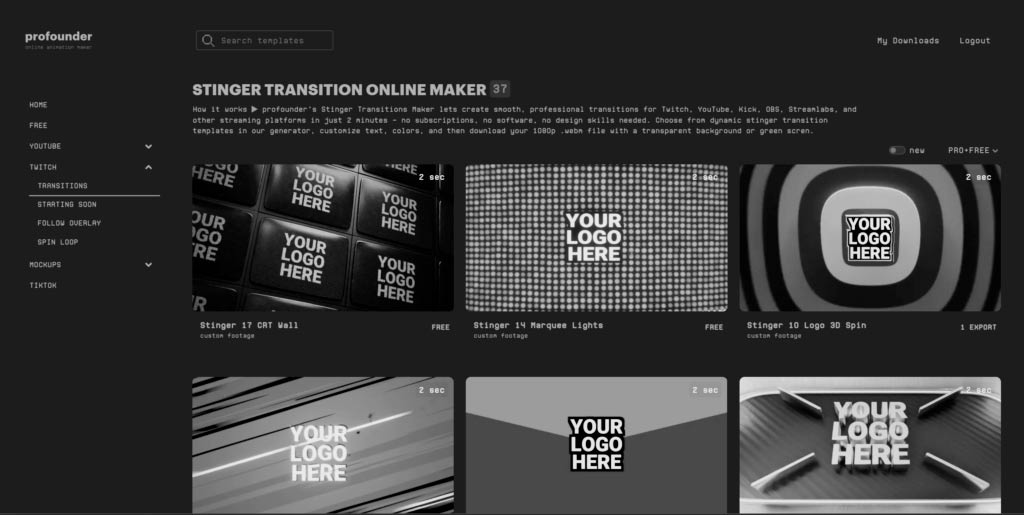
example templates available on the profounder
With profounder Transitions, you can whip up custom Stingers online in 2 minutes—no design skills, no subscriptions, just pure ease. Check also Follow Overlays and Logo Spin Lops makers.
Stick around, because I’ll show you how to use it step-by-step.
2. Types of Stinger Transitions: Find Your Perfect Style
Not all Stinger Transitions are created equal. The right one depends on your stream’s vibe, audience, and content. Let’s break down the main types and how to pick the perfect fit.
Popular Stinger Transition Styles
- Themed Transitions: Logo-free designs like “Fire” (dynamic flames) or “Sakura Flowers” (floral vibes) set a fiery or serene mood without distractions.
- Custom Transitions: Personalized with your logo or colors for a cohesive, standout stream.
- Game-Styled: Tailored to games, matching the aesthetic of RPGs or shooters for visual consistency.
- Minimalist: Subtle fades or wipes for a clean, professional look, ideal for low-key streams.
- Energetic Transitions: Fast zooms or flashes add excitement to high-energy streams.
- Artistic Transitions: Abstract shapes or nature elements bring a unique, creative flair.
- Retro Transitions: Pixel art or glitches for a nostalgic, retro gaming vibe.
- Cinematic Transitions: Movie-like fades or iris wipes for a polished, professional feel.
How to Choose the Right One
Picking a Stinger isn’t just about what looks cool. Consider:
- Your Content: A chill Minecraft stream might not need a wild explosion transition.
- Audience Taste: Younger viewers might love flashy effects; older ones might prefer subtle.
- Tech Limits: High-res transitions can lag on weaker setups—keep file sizes in check.
Pro Tip: Test a few styles in preview mode to see what clicks with your stream.
Where Profounder Fits In
With Profounder Transitions, you’re not stuck with generic options. Customize logo, text, colors, and effects to match any style available there. We’ll dive into creating them next.

how profounder editor looks like
3. How to Create Stinger Transitions: From Scratch by 2 min
Ready to make your own Stinger Transitions? You’ve got two paths: the hard way (DIY with pro software) or the easy way (using our tool). Let’s explore both.
Option 1: The DIY Route with Adobe After Effects
This is the traditional method pros use. Here’s the gist:
- Open After Effects: Start a new project (1920×1080, 30fps recommended).
- Design Your Animation: Use shapes, text, or motion graphics. Think swooshes or fades.
- Add a Transition Point: This tells OBS when to switch scenes (e.g., at 500ms).
- Export with Transparency: Render as a .webm file with an alpha channel using a plugin like Bodymovin.
The Catch:
- Takes hours (or days if you’re new).
- Requires design skills and pricey software ($20.99/month for After Effects).
- Steep learning curve.
Option 2: The Easy Way with Profounder Transitions
Why struggle when you can simplify? Here’s how to create a Stinger in 2 minutes with Profounder Transitions:
Step-by-Step Guide to Using Profounder
- Visit the Site: Head to Profounder Transitions.
- Pick a Template: Choose from styles like “CRT Wall” or “Neon Slash.”
- Customize It:
- Add text (e.g., your stream name).
- Tweak colors to match your brand.
- Adjust timing or effects. [Insert screenshot of Profounder interface here—showing template options]
- Preview: See your Stinger in action instantly.
- Export: Download a 1080p .webm file with transparency—OBS-ready!
Why It’s Awesome:
- No Skills Needed: Drag, drop, done.
- Fast: 2 minutes vs. hours in After Effects.
- Free: No subscriptions, just create and go.
4. Setting Up Stinger Transitions in OBS Studio and Streamlabs
Got your Stinger ready? Time to put it to work. I’ll walk you through setup in the two most popular platforms: OBS Studio and Streamlabs.
OBS Studio Setup
OBS is the go-to for streamers, and adding a Stinger is a breeze. Follow these steps:
- Open OBS Studio: Launch the app.
- Access Scene Transitions: In the bottom-right “Scene Transitions” box, click “+.”
- Select Stinger: Choose “Stinger” from the dropdown and name it (e.g., “Neon Swoosh”).
- Add Your File: Click “Browse” and select your .webm file from Profounder.
- Set Transition Point:
- Choose “Time (milliseconds).”
- Enter a value (e.g., 1000ms—half a second into the animation).
- Audio Options:
- Set “Audio Monitoring” to “Monitor and Output” if your Stinger has sound.
- Test It: Switch scenes in preview mode to ensure it works.
- Hit OK: You’re live-ready!
Streamlabs Setup
Streamlabs is similar but has a slightly different interface:
- Open Streamlabs: Start the software.
- Go to Transitions: In the “Scenes” panel, click the gear icon next to “Transitions.”
- Add Stinger: Select “Stinger” and upload your .webm file.
- Adjust Timing: Set the transition point (e.g., 1000ms).
- Audio: Enable “Monitor and Output” for sound.
- Save: Test it out and save your settings.
Tips for Both
- File Format: Stick to .webm for compatibility and transparency.
- Test First: Always preview before going live.
- Backup: Keep your Stinger files handy in case paths break.
Now your stream’s got that pro polish!
5. Best Practices for Stunning Stinger Transitions
Creating and setting up Stingers is just the start. Here’s how to use them like a pro.
Timing Is Everything
- Keep It Short: 2-3 seconds is the sweet spot—long enough to impress, short enough to not annoy.
- Sync with Action: Time the transition point so the scene switches at the animation’s peak (e.g., when the swoosh hits center-screen).
Audio Integration
- Add Sound: A subtle whoosh or chime can elevate the effect. Profounder lets you preview audio options.
- Sync It Up: Ensure the sound peaks with the visual—test in preview mode.
Optimize Performance
- File Size: Aim for under 10MB to avoid lag. Profounder exports lightweight 1080p files.
- Format: .webm is king for quality and low CPU use.
Don’t Overdo It
- Moderation: Use Stingers for key switches (e.g., Live to BRB), not every tiny change.
- Consistency: Stick to one or two styles to keep your brand cohesive.
Test, Test, Test
- Run your Stinger in OBS or Streamlabs preview mode to catch glitches before viewers do.
Follow these, and your transitions will be smooth as butter.
6. Troubleshooting Common Stinger Transition Issues
Even the best setups hit snags. Here’s how to fix the most common problems.
“My Transition Won’t Play!”
- Check File Path: If you moved the .webm file, update the path in OBS/Streamlabs.
- Format Issue: Ensure it’s .webm with transparency and re-export from Profounder if needed.
“My Stream Lags with Stingers!”
- Optimize File: Reduce resolution (e.g., 720p) or simplify the animation.
- Check PC Specs: Stingers are light, but an old rig might struggle—lower other settings.
There you have it—the ultimate guide to Stinger Transitions. You’ve learned what they are, how to pick the right style, create them with ease, set them up, and troubleshoot like a champ. Now it’s time to take action. Start to create one